

Restoring or maintaining a classic car is a rewarding experience, but one of the most overlooked yet critical components is the electrical wiring system. Unlike modern cars with advanced diagnostics, classic vehicles rely on older wiring, aged insulation, and outdated connectors, making them prone to short circuits, corrosion, and fire hazards.
Over time, heat, moisture, and wear can degrade wiring, leading to issues such as flickering lights, inconsistent ignition, or even complete electrical failure. Without proper inspection, these problems can leave you stranded or worse—put your prized classic at risk of an electrical fire.
This guide will walk you through how to inspect classic car wiring, identify potential problems, and take preventative steps to keep your vintage vehicle safe and roadworthy.
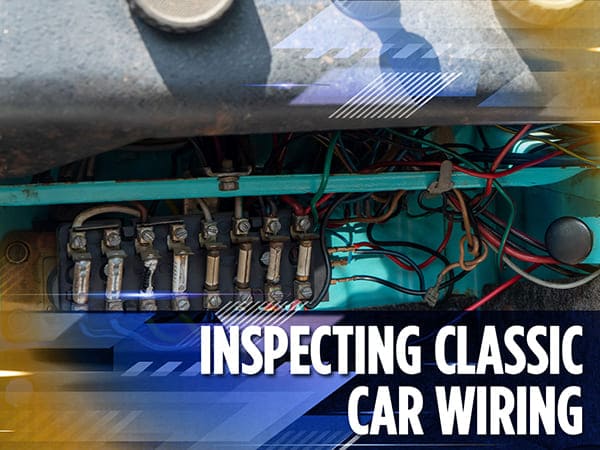
Understanding Classic Car Wiring Systems
Unlike modern vehicles with complex computerized wiring, classic cars have simpler yet more vulnerable electrical systems. Here’s what makes them unique:
1. Basic Wiring Structure
Classic cars typically have a basic 12V (or 6V) electrical system, consisting of:
- Battery – Supplies power to the entire system.
- Alternator (or Generator) – Charges the battery and powers electrical components.
- Fuse Box – Protects circuits from overloading.
- Ignition System – Powers the starter and engine.
- Lighting System – Includes headlights, taillights, and interior lights.
- Wiring Harness – Connects all electrical components together.
2. Common Problems in Classic Car Wiring
Since most classic cars were built decades ago, their electrical systems often show signs of age and wear, including:
- Brittle, cracked, or frayed wires due to heat exposure.
- Corroded connectors and terminals causing poor conductivity.
- Rodent damage from nesting inside engine bays.
- Mismatched wiring from previous incorrect repairs.
- Blown fuses and melted wires due to outdated circuits.
Understanding these vulnerabilities helps you focus on problem areas during your inspection.
Step-by-Step Guide to Inspecting Classic Car Wiring
A thorough wiring inspection requires time, patience, and the right tools. Follow these steps to identify and fix potential issues before they escalate.
Step 1: Gather Your Tools
Before starting, equip yourself with:
- Multimeter – Measures voltage, resistance, and continuity.
- Test Light – Quickly identifies live circuits.
- Wire Strippers & Crimpers – For repairing damaged wiring.
- Electrical Tape & Heat Shrink Tubing – Provides insulation and protection.
- Contact Cleaner & Wire Brush – Removes corrosion from connectors.
Step 2: Inspect the Battery and Grounds
A weak or corroded battery connection can cause starting problems and dimming lights.
✅ Check for:
- Loose or corroded battery terminals.
- Frayed or cracked battery cables.
- Bad ground connections (look for rust or corrosion).
💡 Tip: Clean the battery terminals with a wire brush and apply dielectric grease to prevent future corrosion.
Step 3: Examine the Fuse Box
The fuse box is your car’s first line of defense against electrical failures.
✅ Check for:
- Blown fuses (discolored or broken).
- Melted fuse holders (a sign of overloading).
- Loose or corroded connections.
💡 Tip: If fuses keep blowing, you likely have a short circuit that needs further investigation.
Step 4: Check the Wiring Harness for Damage
The wiring harness runs throughout your car, connecting everything from headlights to the ignition system.
✅ Inspect for:
- Cracked or frayed insulation.
- Wires touching hot engine components.
- Rodent-chewed wiring.
💡 Tip: If the insulation is badly worn, consider replacing sections of the wiring harness before a short circuit occurs.
Step 5: Test the Ignition and Charging System
If your classic car is hard to start or the battery drains quickly, the issue may lie in the ignition or charging system.
✅ Use a multimeter to test:
- Battery voltage (should be 12.6V when off, 13.5-14.5V when running).
- Alternator output (should produce steady voltage without large fluctuations).
- Starter wiring for loose or burned connections.
💡 Tip: If your battery isn’t charging properly, check the voltage regulator and alternator wiring for faults.
Step 6: Inspect the Lights and Switches
Flickering or dim lights indicate poor wiring connections or grounding issues.
✅ Check for:
- Dim or flickering headlights.
- Brake lights that work inconsistently.
- Turn signals that blink too fast or slow.
💡 Tip: Corroded connectors inside light sockets are a common culprit—clean them with contact cleaner.
Step 7: Look for Signs of Previous Repairs or Modifications
Many classic cars have been modified or repaired over the years, sometimes using incorrect wiring techniques.
✅ Watch for:
- Twisted wires wrapped in electrical tape (should be properly crimped and heat-shrunk).
- Non-original wiring that doesn’t match factory colors.
- Poorly spliced connections.
💡 Tip: If the wiring looks messy or inconsistent, consider rewiring that section for safety.
Case Study: How a Simple Wiring Inspection Prevented a Major Fire
John, a classic 1967 Mustang owner, noticed his headlights flickering while driving at night. Instead of ignoring the issue, he decided to inspect his wiring harness.
What He Found:
- A frayed wire near the firewall had exposed copper, nearly touching metal.
- A melted fuse holder indicated a circuit overload.
- Corroded ground connections reduced headlight brightness.
Fixes & Results:
- Replaced the damaged wire and secured loose connections.
- Installed a new fuse box to prevent future overloading.
- Cleaned all grounding points, restoring full headlight power.
John’s quick action prevented a potential electrical fire, proving that regular wiring inspections can save lives and expensive repairs.
Conclusion
Keep your Classic Car’s wiring in top shape! Electrical issues can quickly turn a dream restoration into a nightmare, but regular wiring inspections can prevent costly failures and even fires. By checking connections, fuses, and wire integrity, you ensure your classic car stays reliable and roadworthy.
If you haven’t inspected your classic car’s wiring recently, now’s the time to do it—because a small fix today can save you from a major breakdown tomorrow!
Check our other blogs, like ‘Signs of Aging Suspension Systems,’ for in-depth guides and exclusive advice.
FAQs: Classic Car Wiring Inspection
1. How often should I inspect my classic car’s wiring?
At least once a year or whenever you notice electrical issues like flickering lights or starting problems.
2. Can I replace individual wires, or do I need a full wiring harness replacement?
If only a few wires are damaged, replacing them is fine. But if the harness is brittle or extensively modified, consider a full replacement.
3. What’s the most common wiring problem in classic cars?
Corrosion, brittle insulation, and poor past repairs are the most frequent issues.
4. Can I upgrade my classic car’s wiring to modern standards?
Yes! Installing modern relays, fuses, and thicker gauge wiring improves safety without compromising authenticity.
5. What’s the best way to prevent wiring damage in a classic car?
Store your car in a dry, rodent-free garage, use dielectric grease on connections, and avoid overloading electrical circuits.