

Owning a vintage vehicle is like having a piece of automotive history, but keeping it running smoothly requires regular tuning. Unlike modern cars with computerized diagnostics, classic engines rely on mechanical precision, making routine maintenance even more critical.
Many vintage car owners struggle with hard starts, rough idling, poor fuel economy, and sluggish acceleration—all symptoms of an engine needing a tune-up. Without proper care, age, carbon buildup, and worn components can reduce performance and even lead to breakdowns.
This guide will walk you through how to properly tune up a vintage vehicle, covering everything from spark plugs to carburetor adjustments to ensure your classic runs like it just rolled off the factory floor.
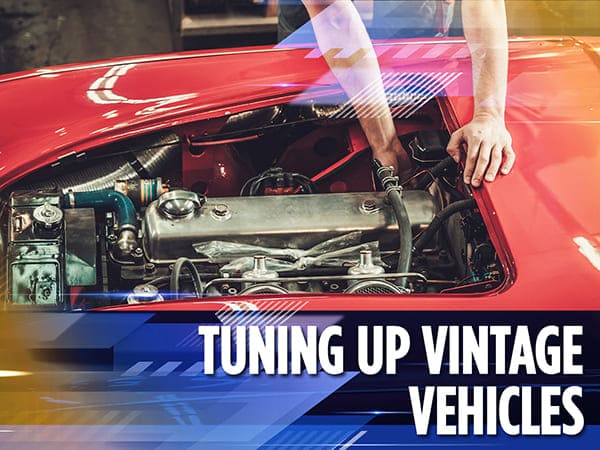
Step 1: Inspect and Replace Spark Plugs & Ignition Components
Why Spark Plugs Matter in Vintage Cars
Spark plugs ignite the air-fuel mixture inside the engine. Over time, they wear out, get dirty, and cause misfires, leading to poor performance.
✅ Signs Your Spark Plugs Need Replacing:
- Hard starts or failure to start.
- Engine misfires or rough idling.
- Reduced fuel efficiency.
How to Replace Spark Plugs
- Remove old spark plugs and inspect for carbon buildup or corrosion.
- Install copper or iridium spark plugs (avoid modern platinum plugs unless the manufacturer specifies them).
- Set the correct gap spacing using a feeler gauge.
Check the Ignition System
A vintage car’s ignition system consists of the distributor, ignition coil, and spark plug wires.
✅ Tune-Up Checklist:
- Inspect spark plug wires for cracks or corrosion.
- Check the distributor cap and rotor—if worn, replace them.
- Test the ignition coil to ensure proper voltage.
💡 Pro Tip: If your vintage car hesitates or misfires, upgrading to an electronic ignition system (instead of points-based ignition) can improve reliability.
Step 2: Adjust and Clean the Carburetor
Why Carburetor Tuning is Crucial
Unlike fuel-injected engines, vintage vehicles use carburetors to mix air and fuel. Over time, fuel varnish, dirt, and incorrect settings cause poor fuel efficiency and rough running.
✅ Signs of a Dirty or Misadjusted Carburetor:
- Black smoke from the exhaust (running too rich).
- Engine stalling or hesitation.
- Difficulty starting, especially in cold weather.
How to Clean and Adjust the Carburetor
- Remove and clean jets, floats, and throttle body with carb cleaner.
- Adjust the air-fuel mixture screws to balance the ratio.
- Set the idle speed to prevent stalling or rough idling.
💡 Pro Tip: If your carburetor is too worn or clogged, a rebuild kit can restore it to factory condition.
Step 3: Change Fluids and Filters
Replace Engine Oil and Filter
Vintage engines accumulate sludge and debris faster than modern ones. Regular oil changes prevent premature wear.
✅ Best Practices for Oil Changes:
- Use high-zinc content oil (such as ZDDP oil) to protect flat-tappet camshafts.
- Change oil every 3,000 miles or annually, even if the car is driven sparingly.
- Replace the oil filter with a vintage-compatible one.
Flush and Replace Coolant
Old coolant can become acidic and corrode the radiator and engine block.
✅ Coolant System Maintenance:
- Flush and refill every 2-3 years.
- Check for leaking hoses, clogged radiators, and failing water pumps.
Inspect and Replace Air and Fuel Filters
- A dirty air filter restricts airflow and reduces power.
- A clogged fuel filter can lead to fuel starvation and rough acceleration.
💡 Pro Tip: Always use ethanol-free fuel in vintage cars to prevent carburetor gumming.
Step 4: Adjust Timing and Valves for Peak Performance
Check and Set Ignition Timing
Proper timing ensures your engine fires at the right moment, maximizing power and efficiency.
✅ How to Set Timing:
- Use a timing light to check ignition timing.
- Adjust the distributor position if timing is off.
💡 Pro Tip: If your engine pings or knocks under acceleration, the timing may be too advanced.
Adjust Valve Clearances
Solid lifter engines require manual valve adjustments to maintain smooth performance.
✅ Steps for Valve Adjustment:
- Rotate the engine to top dead center for each cylinder.
- Use a feeler gauge to measure and adjust valve lash to spec.
Step 5: Check the Charging and Electrical System
Vintage vehicles use generators or alternators for charging. If the system isn’t working properly, your battery may die unexpectedly.
- Test the battery voltage (should be 12.6V when off, 13.5-14.5V when running).
- Inspect wiring connections for corrosion.
- Check the alternator or generator output using a multimeter.
💡 Pro Tip: If your vintage car still has a generator, consider upgrading to an alternator for better charging performance.
Case Study: How a 1965 Chevrolet Impala SS Was Revived with a Tune-Up
Tom inherited a 1965 Chevy Impala SS from his grandfather, but it sat in storage for 15 years. When he tried to start it, the engine cranked but wouldn’t fire.
What He Did:
- Replaced spark plugs, ignition coil, and wires.
- Cleaned and rebuilt the carburetor.
- Changed all fluids, flushed the cooling system.
- Set ignition timing and adjusted valve clearances.
Results:
- The car started up smoothly for the first time in years.
- Performance improved with better throttle response and fuel economy.
- The value of his Impala increased after being fully operational.
This case shows that even neglected vintage vehicles can be brought back to life with the right tune-up.
Conclusion
Tuning up a vintage vehicle is both a science and an art. By checking ignition components, cleaning the carburetor, changing fluids, adjusting timing, and maintaining the electrical system, you ensure your classic car runs smoothly and reliably.
A properly tuned vintage vehicle is more than a showpiece—it’s a joy to drive. Start your tune-up today and experience your classic car’s full potential!
Want to learn more about classic car maintenance? Explore our latest guides, like ‘Classic Car Storage Solutions,’ for expert tips and in-depth advice!
FAQs: Tuning Up Vintage Vehicles
1. How often should I tune up my vintage car?
At least once a year or every 5,000 miles to keep it running reliably.
2. What fuel is best for vintage cars?
Use non-ethanol fuel or ethanol stabilizers to prevent carburetor issues.
3. Can I upgrade a vintage ignition system?
Yes! Electronic ignition kits improve reliability while maintaining a stock appearance.
4. Why does my vintage car stall when idling?
It could be a clogged carburetor, improper timing, or vacuum leaks. A full tune-up can fix this.
5. Do vintage cars need synthetic oil?
No, use high-zinc (ZDDP) conventional oil to protect older engine components.